최근 Notion을 통해 모든 메모들을 정리하고 있었는데 점점 속도가 느려지는 것 같은 느낌이 들어 별도의 블로그를 관리할 필요를 느꼈습니다. 기존에 Jekyll이나 Hexo같은 블로그 프레임워크 대신 React로 구성되어 있는 gatsby를 이용하여 정적 블로그를 구성해봤는데 평소 개발하던 스택과 비슷해서 커스터마이징도 쉽고 설치 및 사용도 편리한 것 같습니다.
Installation
node, npm, xCode나 git 등은 기본적으로 설치되어 있다고 가정하고, gatsby-cli를 설치합니다.
$ npm install -g gatsby-cli
Gatsby 블로그 생성하기
여러 starter들을 이용해 기본적인 테마를 가진 Gatsby 블로그를 생성할 수 있습니다.
Hexo나 Jekyll에 있는 Theme랑 동일한데 Gatsby에서는 Starter라는 이름으로 제공하는 것 같습니다.
아무것도 없는 기본 starter를 이용해 gatsby 블로그를 생성하는 경우 아래와 같이 진행할 수 있어요.
$ gatsby new hello-world https://github.com/gatsbyjs/gatsby-starter-hello-world
Gatsby의 Starter들은 아래 링크에서 확인할 수 있습니다.
저는 아래 링크의 gatsby-starter-lumen을 이용해 전체적인 틀을 구성하고, css나 구성을 조금씩 변경해서 사용하고 있습니다.
$ gatsby new my-gatsby-project https://github.com/alxshelepenok/gatsby-starter-lumen
$ cd my-gatsby-project
$ gatsby develop
순서대로 실행하고 localhost:8080으로 접속하면 아래와 같은 화면이 표시됩니다.
css나 구성을 변경하고 싶으시면 직접 커스터마이징을 진행하시면 됩니다.
Gatsby 플러그인 적용하기
lumen starter의 경우 코드 블럭 모양이 노란색이고 예쁘지 않은것 같아서 아래 플러그인을 추가로 적용했습니다.
- gatsby-remark-highlight-code
위 플러그인을 적용하면 코드 블럭의 모양이 아래와 같은 모양으로 변경됩니다.
적용 전 설치를 위해 루트 디렉토리에서 아래 명령어를 실행합니다.
$ npm install --save gatsby-transformer-remark gatsby-remark-highlight-code @deckdeckgo/highlight-code
이후 아래 설정 파일에 플러그인 설정을 추가합니다.
gatsby-config.js
plugins: [
  {
    resolve: `gatsby-transformer-remark`,
    options: {
      plugins: [
        {
          resolve: `gatsby-remark-highlight-code`
        },
      ],
    },
  },
]
추가로 load를 위해 코드 내에 아래 내용을 추가합니다.
저는 사용하는 테마에 맞춰 아래 파일에 추가했습니다.
src/components/Layout/Layout.js
// @flow strict
import React from 'react';
import { defineCustomElements as deckDeckGoHighlightElement } from '@deckdeckgo/highlight-code/dist/loader';

const Layout = ({}: Props) => {

  deckDeckGoHighlightElement();
  return ();
}
Google Analytics
lumen starter의 경우 아래 설정 변경으로 간단하게 Google Analytics의 적용이 가능합니다.
아래 googleAnalyticsId에 추적 ID 값을 입력하면 등록이 끝납니다.
config.js
module.exports = {
  url: 'https://kyucumber.github.io',
  // ...
  googleAnalyticsId: '@Google Analytics Id'
}
Disqus 댓글 추가하기
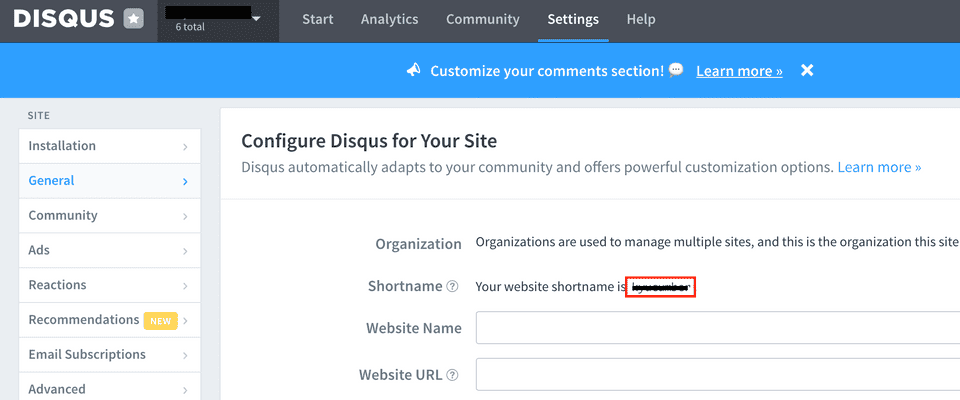
disqus 홈페이지에서 shortname을 복사해 config.js에 입력하면 댓글 기능을 이용할 수 있습니다.
config.js
module.exports = {
  url: 'https://kyucumber.github.io',
  // ...
  disqusShortname: 'your-short-name'
}
Github Pages를 이용해 배포하기
저는 원본 소스 코드를 저장하는 private repository와 static 정적 파일이 배포될 public repository를 별도로 구성했습니다.
우선 deploy를 도와주는 gh-pages를 설치합니다.
$ npm install gh-pages --save-dev
배포를 위해 package.json을 수정합니다.
저는 실제 소스 코드 repository와 정적 파일 repo가 분리되어 있어 static remote로 push하도록 설정을 변경했습니다.
$ git remote -v

origin  https://github.com/kyucumber/gatsby-blog.git (fetch)
origin  https://github.com/kyucumber/gatsby-blog.git (push)

# 정적 파일이 저장될 Github pages repo
static  https://github.com/kyucumber/kyucumber.github.io.git (fetch)
static  https://github.com/kyucumber/kyucumber.github.io.git (push)
package.json
{
  "scripts": {
    "deploy": "yarn run clean && gatsby build --prefix-paths && gh-pages -d public --remote static"
  }
}
그리고 아래 명령어를 통해 배포를 진행합니다.
$ npm run deploy
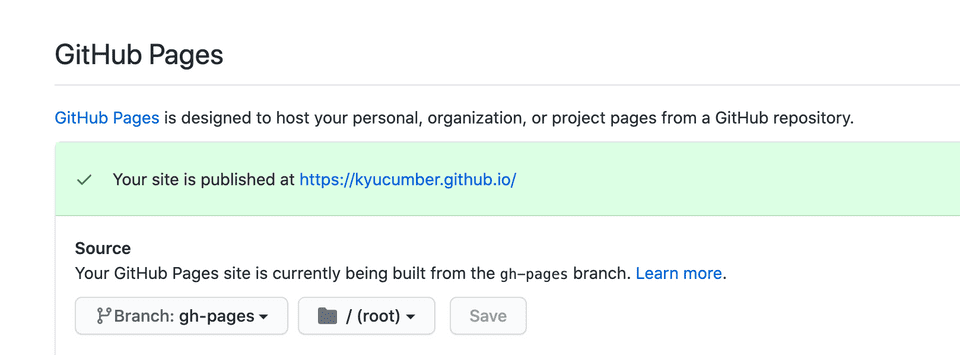
위 설정으로 배포시 gh-pages 브랜치로 배포가 되기 때문에 아래 설정에서 branch를 변경해야 합니다.


